Smashing Through The Lands Between: Three Ridiculously Fun Strength Builds in Elden Ring
Elden Ring Strength build fans will love these powerful, over-the-top setups for 2026, perfect for demolishing bosses with style.
Let’s be honest—I’ve dabbled in sorceries, danced around with katanas, and even tried the sneaky-snake approach with daggers. But nothing, and I mean nothing, gets the blood pumping like hefting a weapon the size of a small car and turning demigods into pancakes. If you’ve been sleeping on the pure, unga-bunga joy of a Strength build, 2026 is the year to wake up. Elden Ring may have been out for a while, but the Lands Between are still crawling with bosses that desperately need a good bonking. I’ve tinkered, tested, and died in spectacular ways to bring you three gloriously over-the-top Strength builds that will make even Radahn blush.
Before we dive into the hardware, a quick nod to your starting class. You can absolutely become a hulking brute no matter how you begin, but let’s not pretend some origins aren’t tailor-made for the lifestyle. 🦸 The Hero is the undisputed beefcake, striding out of the Chapel of Anticipation with an axe and a dream. Honorable mentions go to the Vagabond (versatile and tanky), the Samurai (a surprisingly hearty base for a later respec), and the Confessor (if you like a side of healing with your hammer). For the builds below, though, I assume you’ve embraced your inner Hero and are ready to pump that Strength stat until the numbers turn red.
Dual Giant-Crushers: The “Land Shark” Protocol
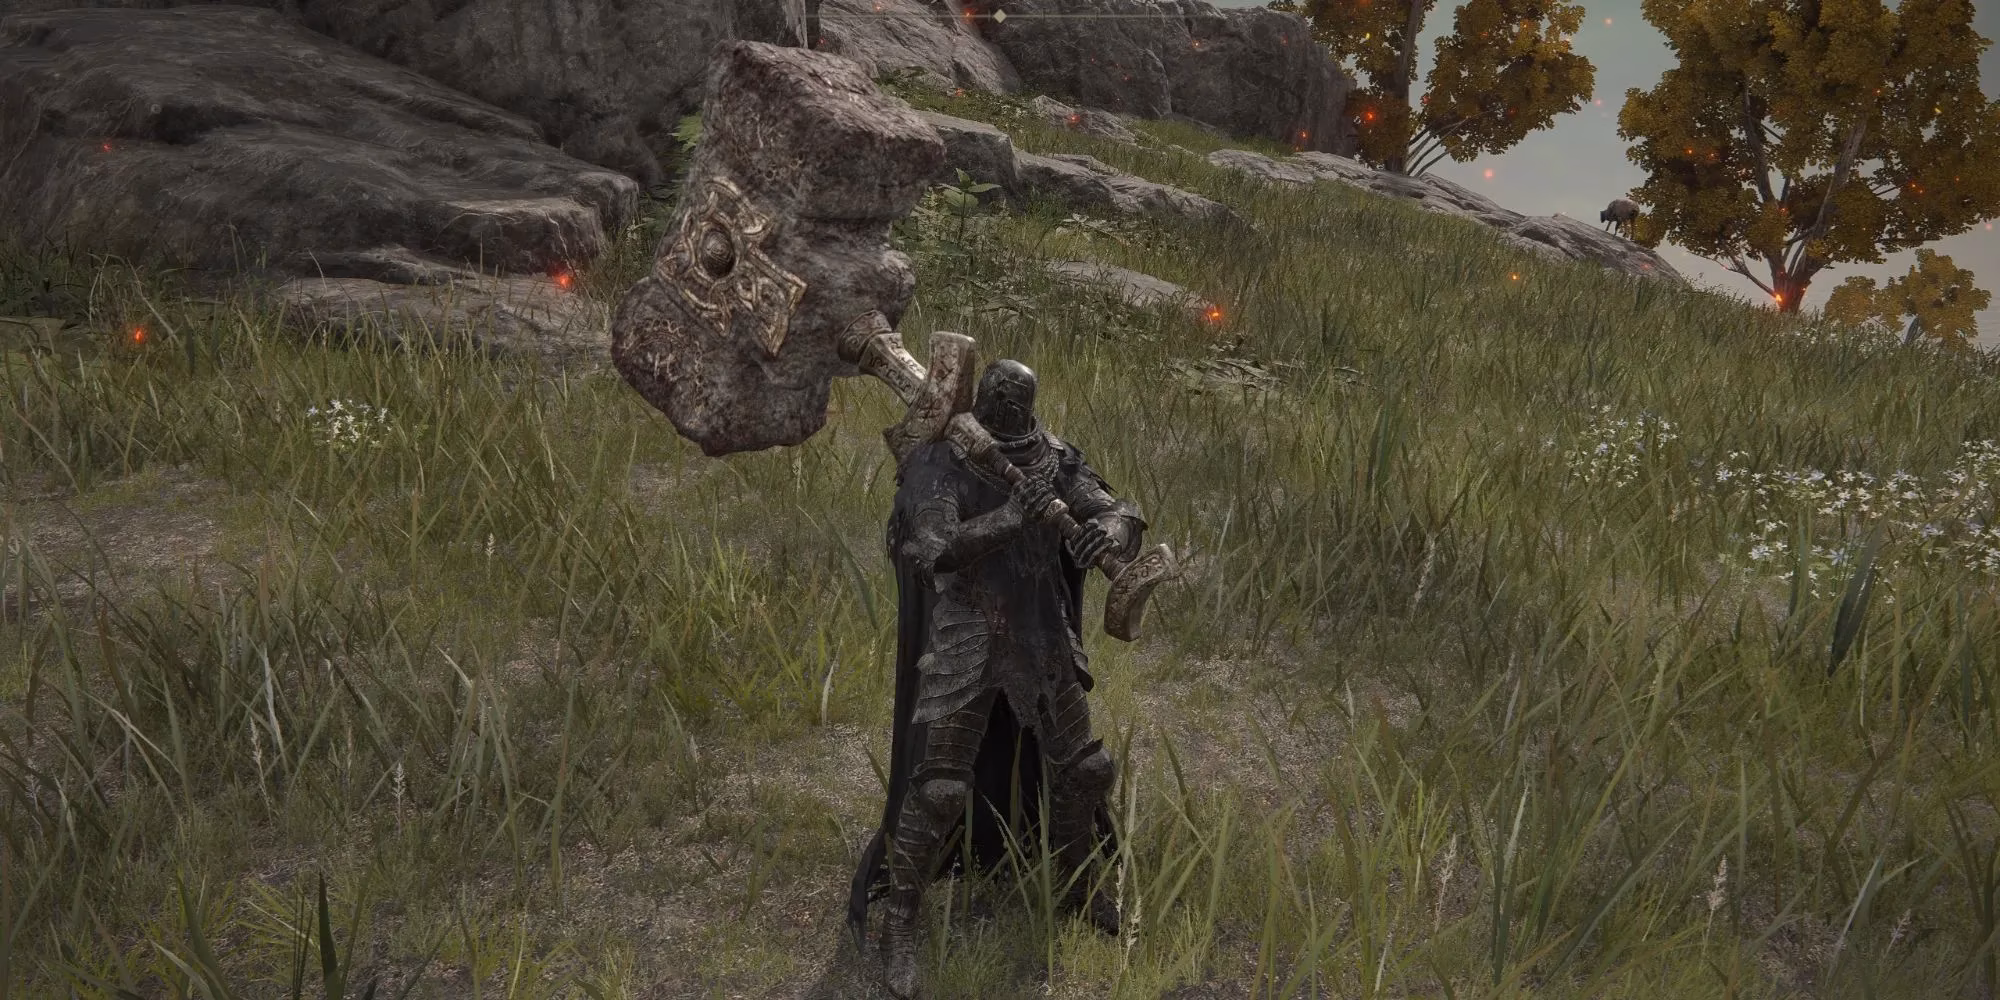
Imagine an asteroid made of hatred, split in two, and strapped to your hands. That’s the Dual Giant-Crusher setup. I won’t sugarcoat it: you need 60 Strength just to stop dragging these things on the ground, and your Endurance has to be high enough that you don’t collapse into a heap after one swing. Yes, the stats are demanding, but the payoff is a glorious symphony of one-shot kills. Most standard enemies dissolve into a fine mist, and even proper bosses suddenly remember urgent appointments elsewhere.
Here’s the core framework:
-
Weapons: Dual Giant-Crusher Hammers
-
Armor: Raptor’s Black Feathers Robe
-
Ashes of War: Royal Knight’s Resolve
-
Talismans: Claw Talisman, Green Turtle Talisman
The secret sauce is the Royal Knight’s Resolve Ash of War, which gifts a 160% damage boost (80% per hammer) to your next attack. Since you’ll be slamming the ground like an angry meteor, you mainly jump attack with this build—hence the Raptor’s Black Feathers, which turbocharges aerial assaults. Slap on the Claw Talisman to further amplify jumping hits, and the Green Turtle Talisman to recover stamina between your frantic, gravity-assisted demolitions. I can’t stress the turtle enough; without it, you’ll pant like a dog in a heatwave after two hits.
One play note: timing is everything. Against fast foes, you’ll learn to bait out attacks and punish recovery windows. There’s nothing quite like leaping over a Crucible Knight’s swing and crushing its ambitions (and spine) in a single blow. Just make sure you’re not on a cliff. Gravity is still the true final boss. 😅
The Star Caller: Gravity’s Favorite Himbo
-(1).jpg?q=50&fit=crop&w=825&dpr=1.5)
If the Giant-Crushers are about raw, direct obliteration, the Star Caller build is about looking absolutely majestic while you delete everything in a ten-meter radius. The Starscourge Greatsword isn’t just a weapon—it’s a pair of swords disguised as one, a tribute to General Radahn’s love of gravity magic and his tiny horse.
The loadout:
-
Weapon: Starscourge Greatsword
-
Armor: Raptor’s Black Feathers
-
Ashes of War: Starcaller Cry (built-in)
-
Talismans: Claw Talisman, Rotten Winged Sword Insignia, Green Turtle Talisman
Yes, the per-hit damage is slightly lower than double hammers, but the Starcaller Cry Ash of War is a crowd-control masterpiece. It yanks enemies toward you, staggers them, and then follows up with an explosive shockwave. It’s like hosting a very unfriendly party where you are the bouncer and the dance floor is lava. The Rotten Winged Sword Insignia ramps up damage with successive attacks, so chaining normal swings into jump attacks creates a blender of pain.
One critical detail: you need Intelligence. I know, I said Strength build, but this blade scales beautifully with INT, around level 35 by the time your Strength hits 70. Don’t panic—it’s okay to crack open a book. When you two-hand the weapon (which you always should), it splits into two swords, doubling your attack speed and applying statuses faster. This transforms you into a spinning vortex of gravity and bad intentions. Bosses like Malenia, who rely on mobility, become much more manageable when you can literally rip them back into your blender. 🌀
Fire Greatsword: The Forbidden Front-Flip
-(1).jpg?q=50&fit=crop&w=825&dpr=1.5)
And now, my absolute favorite: the Fire Greatsword build, dedicated to the noble art of somersaulting directly into an enemy’s face and watching their health bar evaporate. This colossal weapon hits like a freight train, and with the right setup, you can flatten major bosses in under ten swings.
The moving parts:
-
Weapons: Fire Greatsword, Any Sacred Seal (Left Hand)
-
Armor: Crucible Axe Armor
-
Ashes of War: Lion’s Claw
-
Talismans: Erdtree’s Favor, Warrior Jar Shard, Faligreed Crest
-
Spells: Golden Vow, Flame Grant Me Strength
The star of the show is Lion’s Claw. Activating it executes an unstoppable forward flip—once the animation begins, you cannot be staggered. The attack lands with a massive hitbox and damage so high it feels like the game is apologizing to you. Even better, the flipping motion has a deceptively small hurtbox, so enemies often whiff their attacks right under your airborne form. It’s poetry in motion, if poetry involved screaming and massive chunks of metal. 🔥
Because everything you’re wearing and swinging weighs as much as a small fortress, the Erdtree’s Favor and Faligreed Crest are essential—they boost your equipment load, stamina, and HP so you can actually dodge occasionally. The Warrior Jar Shard pumps up the already absurd damage of Lion’s Claw. You’ll also need a respectable Faith stat (around 25-30) to cast Golden Vow and Flame Grant Me Strength, which stack multiplicative buffs that turn your front-flip into a tactical nuke.
A typical boss encounter: buff up, wait for an opening, execute Lion’s Claw. Watch a fifth of their HP vanish. Repeat until they die confused and resentful. Just remember to manage your FP, because spamming the flip like it’s a TikTok dance will leave you dry and vulnerable. The Crucible Axe Armor isn’t just for looks—it provides excellent protection and reminds everyone that you fully intend to bully them. 🛡️
Final Bonks of Wisdom
All three builds share a common thread: they reward patience, positioning, and a deep, almost spiritual commitment to hitting things really hard. The Lands Between are still crawling with horrors in 2026—patches and expansions have only added more things deserving of a good flattening. Whether you prefer the twin-slam lifestyle, gravity-assisted yanking, or the sacred art of the battle-flip, a Strength build delivers a kind of satisfaction no spell or bleed proc can match.
So grab the biggest chunk of iron you can find, throw on some armor that makes you look like a walking shed, and go remind the demigods that their reign ends the moment you press the jump button. I’ll be right there with you, probably still trying to get that second Giant-Crusher to drop. 🤦♂️
Good luck, Tarnished. May your stamina bar be ever full and your foes forever horizontal.